
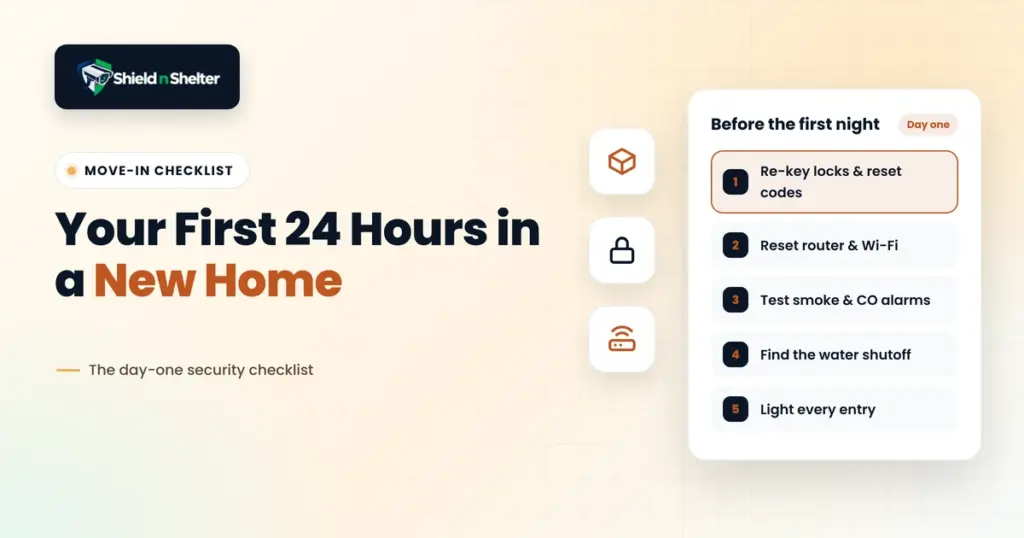
The moment the closing paperwork is signed and the moving truck pulls into the driveway, most homeowners are consumed by logistical chaos: furniture placement, unpacking kitchen essentials, and figuring out the thermostat. However, from a forensic security engineering perspective, the first 24 hours in a new home represent the single highest-risk vulnerability window in the property’s entire lifecycle.
During moving day, exterior doors are frequently left propped open, garage gates stand unlocked, distracted family members are moving between rooms, and high-value electronics boxes sit visible from the curb. Compounding these physical risks, dozens of unaccounted individuals—previous owners, contractors, painters, realtors, and rental cleaning crews—may still possess physical keys or access codes to your doors.
Want the full list, not just the first day? Use our 21-point move-in security checklist.
Relying on the assumption that you will “get around to security next weekend” leaves your family and assets exposed during the exact period opportunists target new move-ins. Following the principles of Day-One New Home Security Setup, this comprehensive engineering checklist outlines the critical physical, optical, environmental, and digital safeguards you must execute within your first 24 hours.
Always prioritize physical delay and access control first. High-tech cameras and smart apps cannot stop an intruder who possesses a working physical key or can kick open an unreinforced strike plate in 10 seconds. Secure the physical shell before configuring digital accessories.
Phase 1: Immediate Access Control & Key Governance (Hours 0 – 2)
Before you unload a single piece of high-value furniture or leave the property unattended for a hardware store run, establish absolute authority over every physical access point.
1. Rekey Every Exterior Cylinder Immediately
Never rely on the physical keys handed to you across the closing table. In the standard lifecycle of a pre-owned home, duplicate keys are routinely cut and distributed to home staging crews, general contractors, dog walkers, and neighbors over years. Rekeying allows you to retain the existing architectural deadbolt hardware while scrambling the internal pins, rendering every prior duplicate obsolete in minutes.
- Standard Mechanical Hardware: Have an ASIS-aligned mobile locksmith rekey all exterior deadbolts and handle sets to a single master key.
- ANSI/BHMA Grade 1 Standard: Verify that all exterior deadbolts feature a solid 1-inch steel throw bolt with an anti-saw hardened steel roller pin. If existing deadbolts are stamped Grade 3 (builder-grade), replace them immediately with Grade 1 or Grade 2 hardware.
2. Replace Strike Plate Screws with 3-Inch Hardened Steel
Standard builder-grade entry doors are installed using 0.75-inch screws that merely penetrate the decorative wooden door jamb. When an intruder attempts a kick-in or shoulder ram, the soft pine frame splits effortlessly along the grain in under 15 seconds.
- Remove the factory screws from the brass strike plate on the door frame.
- Drive four 3-inch #9 or #10 hardened steel screws through the strike plate and deep into the underlying 2×4 structural wall studs.
- This single 10-minute, $5 hardware upgrade increases forced kick-in resistance from 15 seconds to over 2.5 minutes, turning a violent breach into a noisy, prolonged failure.
3. Factory-Reset Electronic Keypads, Garage Remotes & Alarm Hubs
If your new home came equipped with smart locks, digital keypads, or an existing overhead garage door opener, all stored memory must be wiped clean:
- Overhead Garage Door Opener: Press and hold the “Learn” button on the motor housing for 6 seconds until the indicator light extinguishes. This permanently unpairs all legacy remotes and exterior wireless keypad PINs that may still be in a neighbor’s or former contractor’s car.
- Smart Deadbolts: Perform a hardware factory reset to purge master codes and guest access PINs. Program a fresh 6-digit master PIN.
- Legacy Alarm Panels: Disconnect legacy monitored alarm panels from phone lines or cellular dialers until you establish independent ownership, preventing false alarm dispatch fees.
4. Conduct the “Fake Rock” & Spare Key Hunt
Walk the entire exterior perimeter to locate and remove any hidden mechanical keys stashed by previous occupants. Check common hiding locations: magnetic key boxes on gas meters, fake plastic rocks in garden beds, tops of exterior door trim, electrical breaker boxes, and under potted patio planters.
Phase 2: Ground-Level Physical Delay & Perimeter Hardening (Hours 2 – 6)
Over 70% of residential break-ins occur through ground-floor access points, with rear sliding glass doors and obscured side windows representing the most exploited vulnerabilities.
5. Fortify Sliding Patio Glass Doors
Sliding patio doors are notorious for weak factory latches that can be popped open with a flathead screwdriver or lifted directly out of their lower tracks. Implement dual-layer physical delay:
- Auxiliary Drop Bar: Install an adjustable heavy-gauge aluminum security bar (Charley bar) mounted at waist height to prevent horizontal movement.
- Anti-Lift Upper Track Screws: Drive two pan-head sheet metal screws into the upper track frame above the sliding panel, leaving just enough clearance for smooth sliding while preventing the door from being lifted off its track.
- Security Laminate: For ground-level glass sills, apply 3M 8-mil safety/security film to prevent glass shattering during smash-and-grab attempts.
6. The 3-Foot / 7-Foot CPTED Landscaping Audit
Using the principles of Crime Prevention Through Environmental Design (CPTED), audit the greenery around your new property to eliminate concealment zones:
- The 3-Foot Shrub Rule: Prune all dense bushes, shrubs, and hedges beneath ground-floor windows down to a maximum height of 3 feet. This prevents an intruder from crouching out of sight while attempting a pry attack.
- The 7-Foot Canopy Rule: Trim tree branches and lower foliage up to 7 feet above the ground to maintain clear horizontal sightlines from the street and neighboring properties.
- Thorny Defensive Landscaping: Consider planting thorny shrubs (such as pyracantha, holly, or rose bushes) directly beneath accessible side windows.
7. Exterior Lighting & Walkway Illumination
Criminals thrive in unmonitored shadows. As night approaches on Day One, ensure your property approach is fully illuminated:
- Replace all non-functional exterior bulbs with warm 3000K LED fixtures (minimum 800 lumens).
- Activate or install dual-head motion-sensor floodlights covering shaded side alleyways, rear patio steps, and detached garage corridors.
Phase 3: Life Safety & Environmental Infrastructure (Hours 6 – 12)
Physical security is only half the equation. Day-one residential preparedness requires validating critical environmental sensors and emergency shutoff mechanisms.
8. Test & Date-Check Smoke & Carbon Monoxide Detectors
Do not assume existing ceiling detectors are operational just because an indicator LED is blinking. Inspect every unit in the house:
- Manufacturing Date Check: Look at the sticker on the back of each unit. National fire codes mandate that all smoke detectors must be replaced every 10 years and CO detectors every 5–7 years.
- Placement Standards: Ensure there is at least one operational smoke alarm inside every bedroom, outside sleeping quarters, and on every habitable floor level.
- Fresh Batteries: Replace 9V backup batteries in all interconnected AC units immediately.
9. Locate, Tag & Test the Main Water Shutoff Valve
During the chaotic unpacking phase, connecting washing machines, water filters, and refrigerators presents a high risk of catastrophic pipe bursts or fitting leaks. Knowing where the main shutoff is located can save tens of thousands of dollars in water remediation:
- Locate the main interior water shutoff valve (typically in the basement, garage, or utility closet where the municipal line enters the foundation).
- Attach a high-visibility fluorescent tag labeled “MAIN WATER SHUTOFF” so any family member can identify it in an emergency.
- Perform a quarter-turn test to verify the ball valve rotates smoothly and cuts off water pressure completely.
10. Electrical Breaker Panel & HVAC Disconnect Security
Locate the primary electrical breaker panel and verify that all individual circuits (refrigerator, HVAC, lighting, sump pump) are clearly and accurately labeled. If the main utility disconnect or meter panel is located on the exterior of the house, ensure it is equipped with a padlock shackle to prevent malicious power tampering from the outside.
Phase 4: Network Isolation & Smart Privacy (Hours 12 – 24)
Your digital front door is just as critical as your mechanical deadbolts. Moving into a new home requires wiping legacy router configurations and a proper smart home network setup to build a hardened cyber foundation.
11. Purge ISP Default Wi-Fi Credentials
If you are using a router supplied by your Internet Service Provider (ISP), the factory default Wi-Fi SSID and password are printed on a physical sticker on the side of the gateway. During open houses, contractor visits, and home showings, dozens of strangers had physical access to photograph this sticker.
- Access the router gateway settings (`192.168.1.1` or `192.168.0.1`).
- Change the administrative password from `admin` to a unique 16-character alphanumeric passphrase.
- Rename the Wi-Fi network (SSID) and enable WPA3 or WPA2-AES encryption. Never include your family name or house number in the network name.
12. Establish an Isolated IoT VLAN for Smart Devices
Modern homes quickly accumulate smart gadgets: video doorbells, smart TVs, robot vacuums, nursery monitors, and connected appliances. Operating these gadgets on the same flat subnet as your personal banking computers and work laptops creates a dangerous lateral traversal vector.
Following our Smart Home Privacy Architecture, segment your network into three isolated subnets:
- VLAN 10 (Trusted): Work laptops, personal smartphones, financial devices, and private NAS backups.
- VLAN 20 (IoT Isolated): Smart cameras, video doorbells, smart locks, thermostats, and smart TVs with client isolation enabled.
- VLAN 30 (Guest): Visitors, babysitters, and contractor mobile devices.
13. Deploy Temporary Camera Sightlines at Correct Elevations
If you have temporary wireless or PoE security cameras, place them covering the primary property bottlenecks on Night One. Adhere strictly to the EN 62676-4 DORI Standard:
- Mount cameras at 7.5 to 8.5 feet with a 15°–20° downward angle to capture clear eye-level facial identification rather than forehead glare.
- Aim cameras across approach paths (chokepoint bottlenecks) rather than looking straight into rising/setting sun horizons.
The Complete 24-Hour Move-In Security Matrix
Use this executive action table to track and check off your Day-One fortification tasks in sequence:
| Hour | Security Zone | Action Item | Est. Time | Threat Mitigated |
|---|---|---|---|---|
| 0 – 1 | Exterior Doors | Rekey all deadbolts & handle sets | 45 min | Unaccounted keys from prior owners/contractors |
| 1 – 2 | Door Jambs | Install 3-inch strike plate steel screws | 15 min | Forced door kick-ins (increases delay by 300%) |
| 2 – 3 | Garage & Keypads | Wipe garage opener memory & reset PINs | 20 min | Legacy remote fobs & contractor keypad codes |
| 3 – 5 | Sliding Glass | Add track drop-bar & anti-lift screws | 30 min | Patio door pry and track-lift attacks |
| 5 – 6 | Perimeter | Audit CPTED landscaping (3ft/7ft rule) | 45 min | Concealment alcoves beneath bedroom windows |
| 6 – 8 | Life Safety | Test smoke/CO alarms & tag main water valve | 30 min | Fire hazards & catastrophic pipe burst damage |
| 8 – 12 | Exterior Lighting | Activate motion-sensor LED floodlights | 30 min | Dark side-walkway shadows & night intrusion |
| 12 – 24 | Home Network | Reset router credentials & build IoT VLAN | 60 min | Wi-Fi packet sniffing & IoT lateral cyber traversal |
Next Steps: Building Your Long-Term Security Blueprint
Completing your first 24 hours establishes a strong foundational baseline against opportunistic crime. However, long-term residential resilience requires a comprehensive, customized security engineering audit tailored to your property’s specific sightline geometry, architectural vulnerabilities, and budget.
At Shield N Shelter, we conduct 100% independent virtual security assessments. We do not sell hardware, we earn zero commissions, and we never push monthly monitoring contracts. We deliver an architect-grade, 15+ page defense blueprint you own forever.
This checklist covers the first day. For the longer version, with pre-closing wiring notes and a week-one priority order, the new homeowner’s security setup guide picks up where this leaves off. Deciding what to secure first is easier once the property has been scored, which the home security assessment guide explains, and if you intend to install the hardware yourself, the DIY planning and installation guide covers the sequence. For camera positions specifically, the room-by-room placement guide has the geometry.