
Magnetic locks look like the high-tech answer to a door problem. No bolt, no key, just a slab of metal on the frame that grabs the door and refuses to let go. Maglock installation is also one of those jobs where the wiring is the easy part and the judgment call is the hard part.
This guide covers how the hardware works, how to install it, and the one fact about maglocks that decides where they belong in a home.
Maglock Anatomy
A maglock isn’t a single part, it’s a small system. Four pieces matter:
- The electromagnet: a steel housing with a coil inside, mounted on the door frame header. Run current through the coil and it turns into a very strong magnet.
- The armature plate: a flat steel plate on the door, lined up with the magnet face. When the magnet energizes, the plate clamps on. Most plates sit on a slightly floating fixture (rubber washers or a spring) so they can lie flat against the magnet even if the door has sagged a bit.
- The power supply: maglocks run on low voltage DC, usually 12V or 24V, and many are switchable between the two. The supply should be rated above the lock’s current draw, with some margin.
- The release device: something has to cut power on purpose. That could be a push-to-exit button, a motion sensor above the door, a keypad (see our guide to keypad door locks) or card reader through a controller, or an emergency release. Without one, the only way through the door is cutting power to the lock.
Holding Force: What 600 lb vs 1200 lb Actually Means
Holding force is the pull needed to separate the plate from the magnet under ideal conditions. Common ratings are 600 lb for lighter interior doors and 1200 lb for heavier ones.
Here’s the catch: those are lab numbers. They assume a clean, flat contact and a perfectly straight pull. Real doorways chip away at that figure in a few ways:
- Tilted plate: a plate that sits slightly off-angle loses a surprising amount of force.
- Dirty surfaces: dirt, paint, or rust on either face weakens the bond.
- Flexing doors: a door that flexes lets someone peel the plate off at one edge instead of pulling straight.
A 600 lb lock is plenty for an office or storage door. A 1200 lb lock suits heavier doors, outdoor gates, or anywhere people might lean on the door hard. Either way, a bigger rating doesn’t turn it into a burglary barrier, which the next sections get into.
Pick the Mounting Style First
Which way the door swings decides the hardware, so sort this out before drilling anything.
An outward opening door, meaning one that opens away from you when you stand on the secure side, uses an L bracket where the frame needs it. An inward opening door, which opens toward you, needs a Z&L bracket. The basic bracket that ships with many locks suits outswing doors with enough room under the transom.
Glass doors add another wrinkle, since screws and glass don’t mix. They need clamp style brackets, which is a good moment to hand the job to a pro.
Installing the Magnet and Armature
Start with the mechanical side. Power comes later.
- Mark the layout: hold the magnet against the header at the top corner on the latch side of the door. The plate goes on the door directly opposite.
- Mount the magnet: use the supplied template and drill pilot holes. Fasten into solid framing, not just trim or drywall, because the header takes real load when someone shoulders the door.
- Mount the plate: attach the armature with the supplied through-bolts, leaving the hardware just loose enough that the plate can float and settle flat against the magnet.
- Check alignment before powering up: close the door and look for even contact across the full face. A gap at one edge means the plate is tilted, and tilt means lost holding force.
- Recheck once energized: the magnet can pull the plate into a slightly different position, so it’s worth a second look.
Wiring: Low Voltage, Done Carefully
Maglock wiring is low voltage, so it’s forgiving, but it still has rules:
- Match voltage to the supply: check the jumper or switch on the lock before connecting power.
- Size the wire for the run: short runs are fine on 18 AWG. Long runs lose voltage, and a lock getting 10V instead of 12V holds noticeably less.
- Watch polarity: many maglocks include an LED and suppression parts, so reversed wiring can mean no operation at all.
- Route power through the release device: the controller, button, or relay sits in the power line and cuts current to the magnet when triggered.
- Check suppression: a coil is an inductor, and switching it off creates a voltage spike. Many locks have a built-in MOV or diode. If the manual says yours doesn’t, add one.
Use a dedicated supply with a fused output, not a random plug-in adapter from a junk drawer.
Power Supply and Battery Backup
A proper access-control power supply gives clean regulated output, circuit protection, and a terminal for a backup battery.
For access control, backup is worth having, since a small sealed battery keeps the lock energized through a short outage. The catch is that on any door that counts as an exit, the whole point is for the lock to let go when power fails. Backup helps keep control of a door, but it doesn’t change what a maglock fundamentally is.
The Fail-Safe Problem
This is the part that trips people up. Maglocks are fail-safe devices: power on means locked, power off means released. Cut the power, trip the breaker, lose the battery, or hit the release, and the door swings free.
That’s exactly right for an exit and exactly wrong for a burglary barrier. Anyone who can reach the power supply or the wiring can open the door without force. Exit sensors are another soft spot, since sensor based release is widely regarded as finicky, and installers have run into sensors that someone disabled with a strip of electrical tape.
Egress rules matter too. In commercial buildings, a maglock released by a sensor generally needs the sensor, a push button, release on power failure, and release on fire alarm. The push button must interrupt power directly and keep the door unlocked for at least 30 seconds.
A different route, a switch built into door-mounted hardware such as panic hardware, follows separate requirements and doesn’t need the sensor, button, or fire alarm release. State and local codes can differ from the IBC or NFPA 101, so the local version is the one that counts.
Homes follow residential code, which in general requires that anyone inside can exit an egress door without a key, special knowledge, or electricity. A maglock on a bedroom or exterior door with no clear manual release is a safety hazard first and a code problem second. If the door is on an escape route, check with the local building authority before installing anything.
Where a Maglock Genuinely Fits at Home
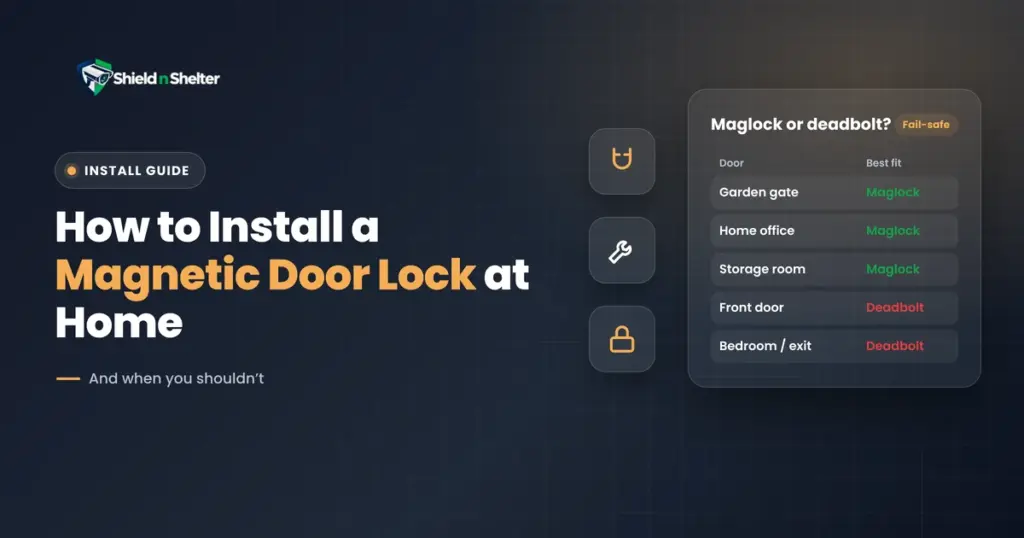
Maglocks shine where the goal is controlled access, not stopping a break-in:
- Driveway and garden gates: outdoor-rated units hold gates shut and release for a keypad or remote.
- Home office: keeps kids and visitors away from work materials, with a push-button release on the inside.
- Storage rooms and pantries: handy for locking away tools, supplies, or valuables. For a closet with no power, see how to lock a bifold door.
- Server closets and utility rooms: controls who gets near networking gear, with a log if the controller supports one.
- Workshops and hobby rooms: keeps little hands away from sharp or heavy equipment.
What these have in common: the door isn’t the only thing between a thief and your valuables, and nobody’s safety depends on getting through it in an emergency.
Where a Deadbolt Is the Right Answer
Reach for a deadbolt, not a maglock, on:
- Exterior entry doors: a deadbolt holds when power fails. A maglock doesn’t.
- Garage entry doors: same reasoning.
- Bedrooms and any door on an escape route: a thumbturn deadbolt, or no lock at all, beats anything that depends on power.
- Anywhere the lock is the main thing stopping unauthorized entry: if the door is the only barrier, power-independent hardware wins.
A deadbolt (check its lock pick resistance grade) with a good strike plate, long screws, and a reinforced frame stops far more brute force than a maglock, mostly because it keeps working when the power doesn’t.
Maglock installation is pretty straightforward: choose the right bracket for the door swing, align the plate and magnet, wire low voltage carefully, use a proper supply, and test the release. The bigger decision comes before any of that. If the door is a security barrier or an exit, go with a deadbolt. If it’s an access-control door where a controlled release makes sense, a maglock earns its spot.